Categories
My recipes

(521) Home made Granola

Homemade Granola: A Crunchy, Nutritious Treat from My Kitchen

There’s something special about a jar of freshly made granola — packed with crunchy nuts, seeds, dried fruits, and a hint of sweetness, every spoonful feels like a nourishing hug. Today, I’m sharing my simple homemade granola made with rolled oats, almonds, walnuts, pistachios, raisins, black currants, chia seeds, flax seeds, sunflower seeds, choco chips, and organic  jaggery powder — no chemicals, no refined sugar, just pure goodness.

This easy granola is perfect for breakfast with milk or yogurt, or as a healthy snack you can munch on any time of the day. Try it once, and you’ll never go back to ‘store-bought’!

So, why settle for store-bought when you can make this wholesome, delicious granola right in your own kitchen. Give it a try, share it with your family, and let me know how you like it in the comments below! Happy crunching!
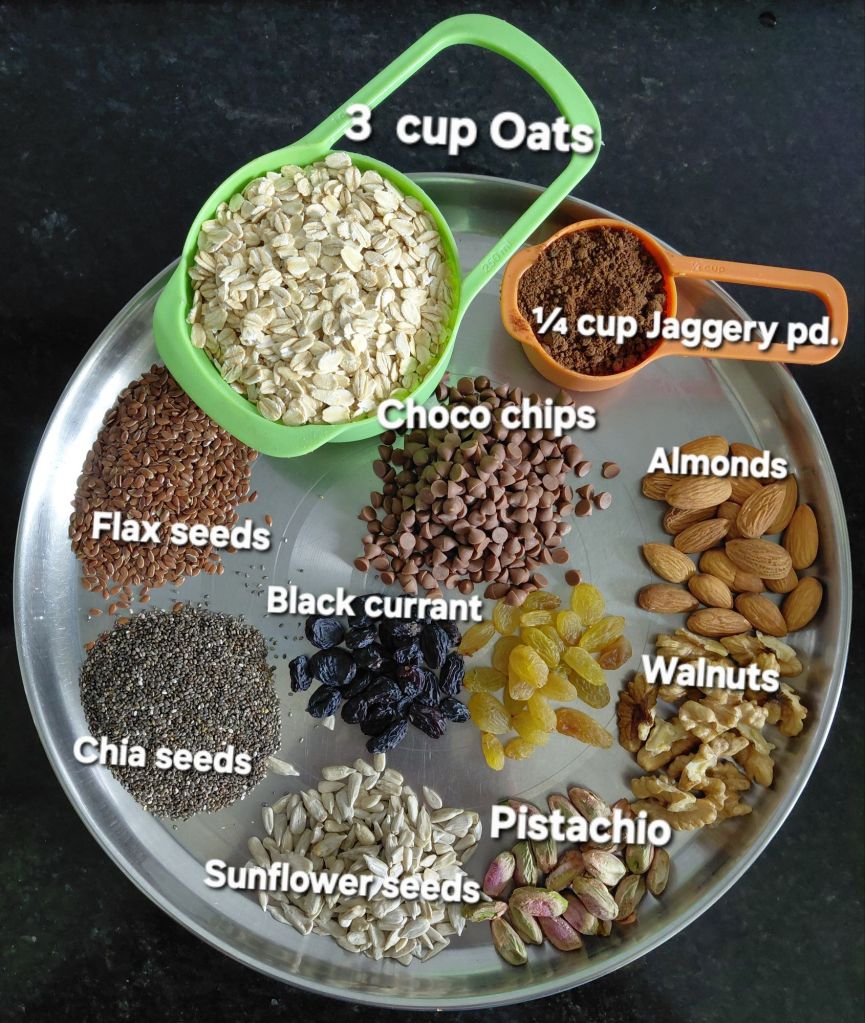
Ingredients

  • 3 cup rolled Oats.
  • ¼ cup Jaggery powder.
  • 20-25 Almonds.
  • 10-15 Walnuts.
  • 20-25 Pistachio.
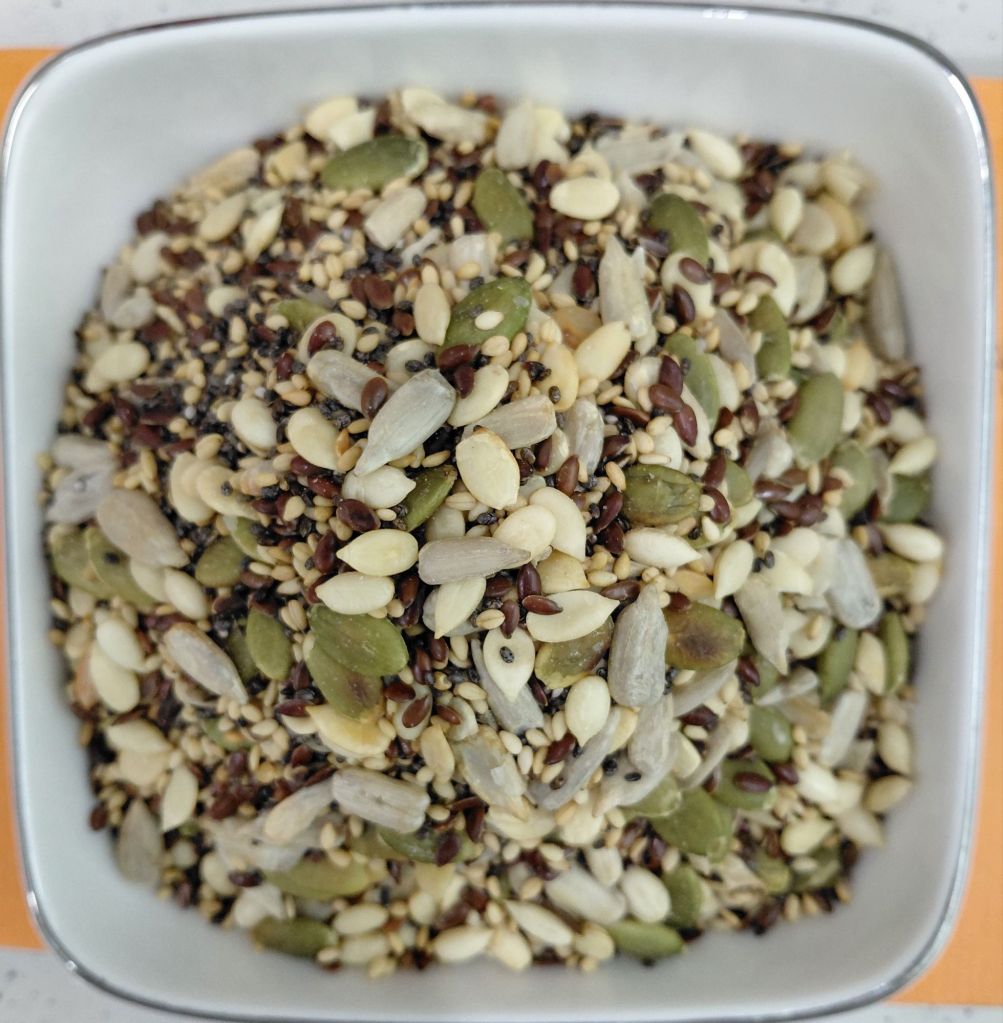
  • 2 tbsp. Sunflower seeds.
  • 1 tbsp. Chia seeds.
  • 1 tbsp. Flax seeds.
  • 2 tbsp. Choco chips.
  • 20-25 Black currant.
  • 20-25 Raisins.

Method

  1. Cut Almonds, Walnuts and Pistachio into small pieces. Dry roast all these on a slow flame and keep aside.
  2. Dry roast Oats on the slow flame. Keep aside.
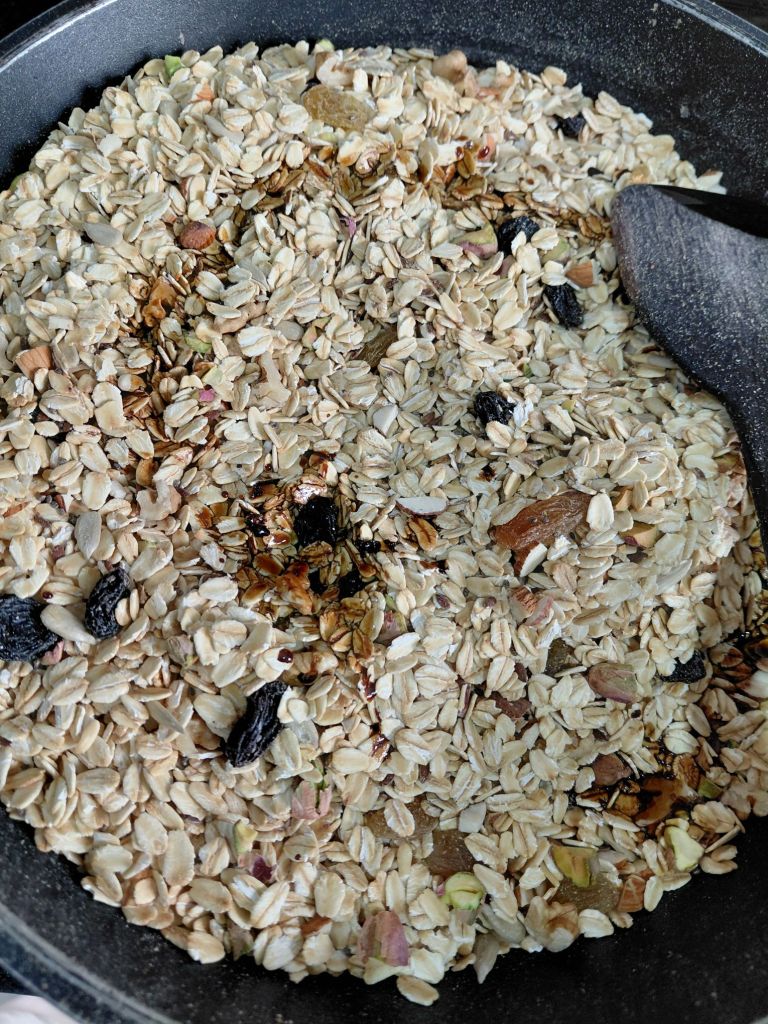
  3. In a oats’s pan mix roasted dryfruits, Raisins and Black currant. Stir 3-4 times and swich off the flame. a small pan add 1 tbsp. Water in a Jaggery powder
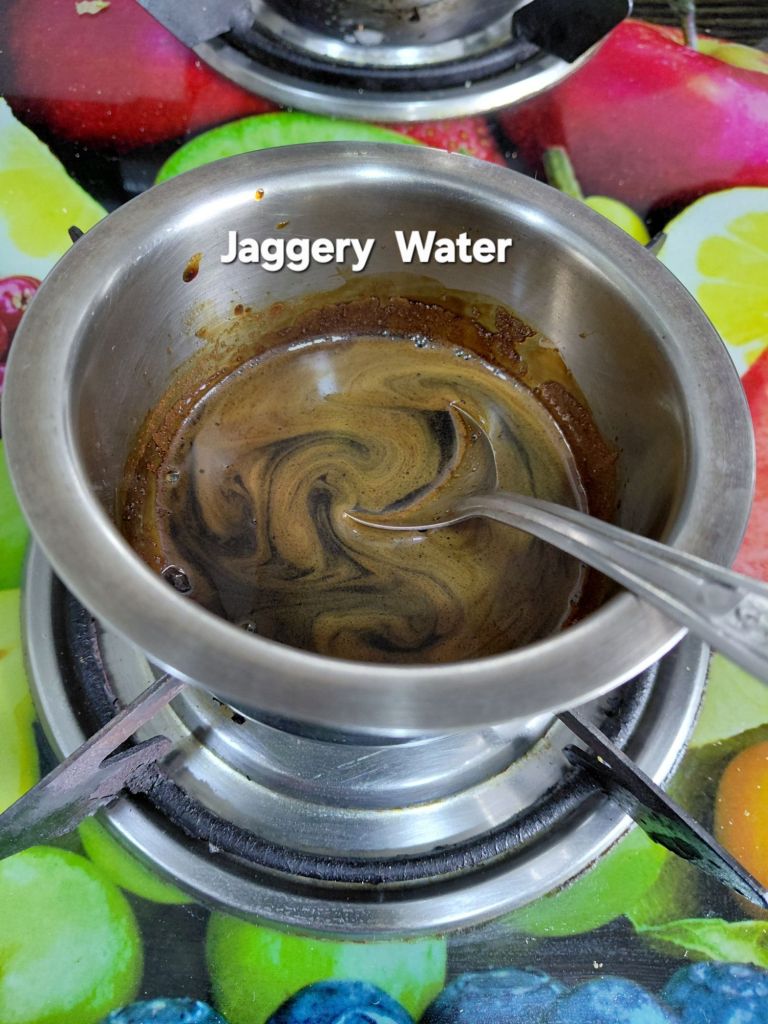
  4. Heat a small pan with 1 tbsp. Water and Jaggery powder. Mix well and when powder melts, switch off the flame.
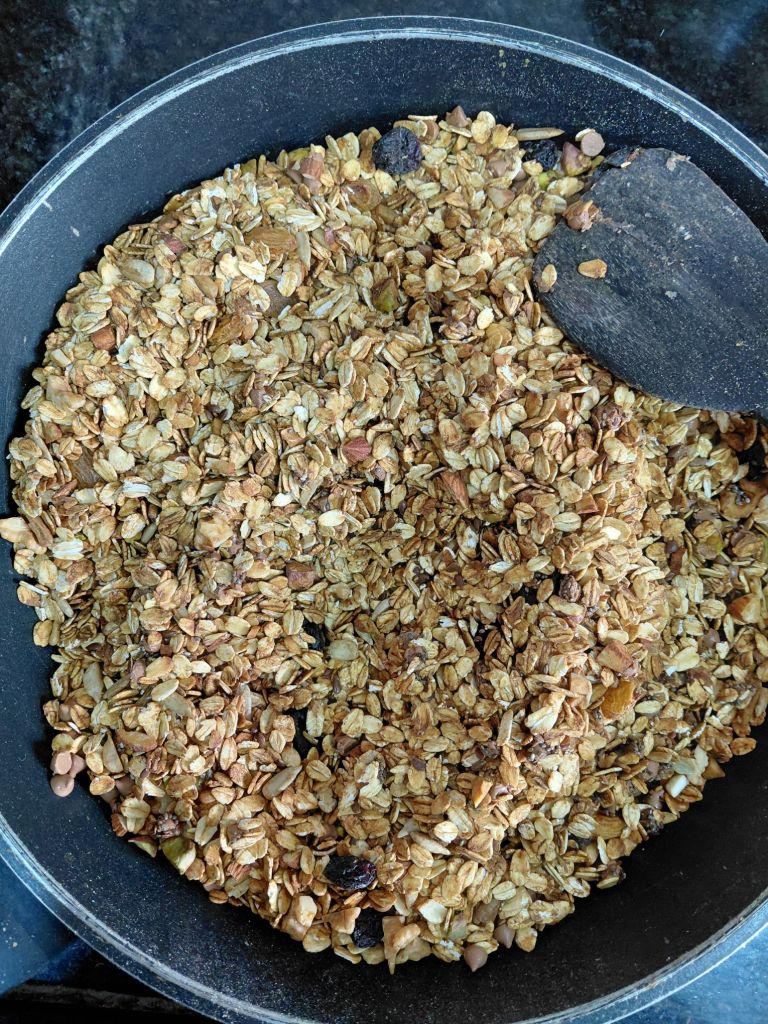
  5. Pour this jaggery water in Oats and dryfruits mix pan. Switch on the flame and on slow flame again roast till water evaporates and oats become crunchy again. This will take 5-7 minutes.
  6. Granola is ready to serve. Serve Granola with hot or cold milk or Yogurt or Curd or as you wish but serve it with love and Smile.
Categories
My recipes

(520) Chana Rice

Brown Chana benefits: High Protein & Fiber: supports muscle health & keeps you full. Rich in Iron: Helps boost hemoglobin, good for women & kids with low iron. Low Glycemic Index: Good for diabetics — doesn’t spike blood sugar quickly. Improves Digestion: The fiber helps prevent constipation & supports gut health. Heart Healthy: Contains good minerals like magnesium & folate — good for blood pressure & cholesterol. Good for Weight Management: Keeps you full for longer — a great snack if boiled or sprouted. Green Chana benefits: Seasonal, Fresh & Cooling. Rich in chlorophyll and water, good for hydration & digestion. Lighter than Brown Chana. Easier to digest.  High in  Vitamin C & antioxidants which supports immunity.

Ingredients

  • ½ cup Tender green Chana.
  • ½ cup brown dried Chana.
  • ½ cup Basmati rice.
  • 1tsp. + 2 tbsp. Oil.
  • ¼ tsp.+ ½ tsp. Cumin seeds.
  • ⅛ tsp. + ¼ tsp. Asaphoitida powder.
  • ¼tsp. +¾ tsp. Salt.
  • 8-10 Curry leaves.
  • ¼ cup finely chopped Coriander leaves.
  • 1½ tbsp. Garam masala.
  • ½ tsp. Turmeric powder.

Method

  1. Wash and soak brown chana overnight for 8-10 hours.
  2. After 10 hours wash twice, add  1½ cup water and pour in the pressure cooker. Cook it upto 3 whistles.
  3. When pressure releases, open the lid and strain the chana and keep aside. Please don’t discard strained water. We will prepare Chana nu Osaman  from it.
  4. Wash Rice two times, soak in 1½ cup of water and keep aside.
  5. Wash green chana and keep aside.
  6. Heat 1 tsp. Oil in a nonstick pan. Add ¼ tsp. Cumin seeds and wait for crackling sound and then add ⅛ tsp. Asaphoitida powder, some curry leaves, Coriander leaves. Soute and add green chana and 1 tbsp. Water.
  7. Close the lid and cook green chana on a slow flame.
  8. Once it becomes tender, switch off the flame and keep aside.
  9. Heat remaining oil in a nonstick pan.
  10. Add remaining Cumin seeds and wait for the crackling sound. Add remaining Asaphoitoda powder, Turmeric powder, Garam masala, Curry leaves and Coriander leaves. Stir once and pour rice along with its water.
  11. Mix both the cooked chana in the rice pan.
  12. When water starts boiling, turn the flame slow , close the lid and cook rice.
  13. Once rice cooked, switch off the flame. Chana rice is ready to serve.
  14. Serve it with Chana Osaman Onion Tomato raitu and papad. Or as you wish but serve it with love and smile.

List Of My Recipes

Categories
My recipes

(519) Raita and Dips

Raita is an Indian origin.Which is always made with yogurt (curd/dahi) as the main ingredient. It usually includes raw or lightly cooked vegetables (like cucumber, onion, tomato), fruits (pineapple, pomegranate), spices (roasted cumin powder, black salt, red or green chillies), and sometimes herbs (coriander, mint).Raita always served as a cooling side dish with spicy meals like biryani, parathas, pulao to balance heat and aid digestion. It is light, refreshing, mildly spiced, with a cooling effect.

The most popular types of raita

  • Cucumber Raita.
  • Beetroot Raita.
  • Carrot Raita.
  • Smoked Baigan Raita.
  • Boondi Raita.
  • Mint Raita or Pudina raita
  • Onion Tomato Raita
  • Moras Raita.
  • Peanut Coriander Raita.
  • Makhana Raita.
  • Fruit Raita ( Banana,Chicoo, Mango, Pineapple)

Dips are globali common in many cuisines (Greek tzatziki, Mexican guacamole, Middle Eastern hummus, cheese dips, etc.).Base of the dip can be yogurt, but also cheese, cream, mayonnaise, chickpeas (hummus), avocados, or even blended veggies.Dips are always served with snacks  like crackers or chips, pita bread or bread sticks, vegetable wedges or fruit wedges. Texture of the dip may be creamy or chunky. Taste of the dips can be tangy, spicy or savory

Some of the popular dips are

Categories
My recipes

(518) Hung curd

A Simple Secret for Thick, Creamy Goodness

Hung curd, also called chakka, is simply fresh curd (yogurt) with its excess water (whey) drained out. This makes the curd thick, creamy, and smooth — similar in texture to Greek yogurt. Regular curd is often watery. For dips, spreads, and desserts, we need curd that holds shape — hung curd does that beautifully. Hung curd is a good substitute for mayonnaise or cream in spreads — lighter and protein-rich.

  Make Hung Curd at Home:

  • Fresh curd (homemade or store-bought)
  • A clean muslin cloth or thin cotton cloth.
  • A bowl 
  • A strainer

Method

1. Take a clean muslin cloth and place it over a bowl or strainer.

2. Pour fresh curd into the cloth.

3. Gather the edges of the cloth and tie it into a tight bundle.

4. Hang this bundle over the sink tap, a hook, or place it over a strainer so the whey drips out.

5. Leave it for 3–5 hours  depending on how thick you want it.

6. After the whey drains out, open the cloth — your thick, creamy hung curd is ready!

Simplest way is to buy Hung curd maker. Pour curd in it . Place it in a frige and after 5-6 hours thick creamy hung curd is ready to use.

Categories
My recipes Raitu

(517) Onion Tomato Raitu

Ingredients

  • 1 cup Curd.
  • 1 medium size onion.
  • 1 Tomato.
  • 2 tbsp. Coriander leaves finely chopped.
  • ⅓ tsp Salt.
  • 1 green Chilli finely chopped (optional)

Method

  1. Wash onion, finely chopped it and keep aside.
  2. Wash Tomato, cut into halves, remove seeds, finely chopped and keep aside.
  3. Whisk curd into smooth consistency, add salt and mix thoroughly.
  4. In a mixing bowl mix curd, chopped onion, tomato, coriander leaves and chillies togather.
  5. Onion Tomato raitu is ready to serve. Serve it with Khichadi, Biryani, Pulao or as you wish but serve it with love and smile.
Categories
My recipes

(516)Kali ni bhaji na Muthiya

Rich in Iron: Good for boosting hemoglobin, helpful for anemia. High in Vitamin A: Supports healthy eyesight, skin, and immunity. Good Fiber Content:
Aids digestion, helps prevent constipation, mild laxative effect. Cooling Effect: In Ayurveda, Nali Bhaji is sheetal — helpful for Pitta conditions and heat in the body. Detoxifying:
Mildly diuretic — supports kidney health, helps flush out toxins.  Antioxidant: Contains beta-carotene and other antioxidants that protect cells.

Ingredients

  • 3 cups Finely chopped Kali ni bhaji leaves.
  • ¼ cup finely Chopped Green Garlic leaves
  • ½ cup Finely chopped coriander leaves
  • ½ cup Curd.
  • 2 Green chillies.
  • 1 inch Ginger piece.
  • 3 cups wheat coarse flour.
  • ½ cup Oil for moen.
  • 1 tsp. Red chilli powder.
  • 1 tsp. Coriander Cumin powder.
  • ½ tsp. Turmeric powder.
  • ¼ tsp. Asafoetida.
  • ¼ tsp. Soda bi carb.
  • Tempering Ingredients
  • 5 tbsp. Oil.
  • 1 tsp. Mustard seeds.
  • 2-3 Green chilies
  • 8-10 Curry leaves.
  • 1 tbsp. Sesame seeds.
  • 2 tbsp. Finely chopped Coriander leaves.

Method

  1. Wash and finely chop kali ni bhaji and keep aside.
  2. Wash Coriander leaves and Green Garlic leaves. Finely chop both greens and keep aside
  3. Green chillies and Ginger either finely chopped or mashed with pestle and mix it in Green masala.
  4. In a big mixing bowl marinate Kali ni bhaji with salt and curd. Keep aside for five minutes.
  5. After five minutes mix Green masala and curd  with Kali ni bhaji. Add flour and all dry masala . Mix all together and knead a soft dough. If needed then add 1-2 tbsp. water. This is a muthiya dough.
  6. Divide dough into eight equal portions and give muthiya shape to each dough portion with the help of your two wet palms. Arrange all muthias in colander.
  7. Simultaneously heat pressure cooker with two glass of water. Place muthiya colander in it . Close the lid and pressure cook upto 3 whisles.
  8. Once pressure released,open the lid. Muthiya are ready to serve or you can coat it with tempering. Cut all muthiya into slices
  9. For tempering, heat oil in a kadhai. Add mustard seeds and wait for crackling sound. Add Curry leaves, Sesame seeds, Coriander leaves and green chillies. Now add all muthiya in the kadhai. Soute for two to three minutes. Muthiya are ready to serve.
  10. Serve Muthiya with Masala Tea or Masala milk or Soups or as you wish but serve with love and smile.

List of my other recipes.

Categories
My recipes

(515)Italian Dabeli

Italian Dabeli is my creative fusion twist on the classic Kutchi Dabeli — a beloved Indian street food. In this version, I’ve swapped the usual spicy potato stuffing for a delicious mix of sautéed mushrooms, fresh broccoli, gooey cheese, and aromatic basil pesto. Instead of stuffing it in a pav, I serve it on a toasted bread slice like an open sandwich, bringing together the best of Indian street food and Italian flavours in every bite and toppings of  Mint chutney. Perfect for kids and adults who want to enjoy something familiar yet refreshingly new!

Ingredients

  • 1 cup Mushroom.
  • 1 cup Broccoli .
  • 1 cup Basil Pesto
  • 2-3 Cheese cubes for garnishing
  • Green Mint Chutney
  • Butter or Ghee for roasting bread slices.

Method

  1. Defrost the Basil pesto cube and keep aside.
  2. Defrost Mint chutney cubes and keep aside.
  3. Grate cheese cubes and keep aside.
  4. Wash Mushroom and Broccoli thoroughly.
  5. Finely chopped both the vegetables and dry soute till all the moisture content dry out.
  6. Switch off the flame and thoroughly mix basil pesto.
  7. Italian Dabeli spread is ready to use
  8. Heat tawa or nonstick pan. Apply butter on both the sides of bread slice. Roast bread on slow flame.
  9. Flip the slice and apply Dabeli spread on the roasted side.
  10. Let other side roast for one minute and take out Dabeli from the pan.
  11. Garnish with grated cheese and Mint chutney. Italian Dabeli is ready to serve. Serve with love and smile.

List Of My Recipes

Categories
My recipes

(514) Mix seeds Mouth Freshener

This homemade Mix Seeds Mouth Freshener is a healthy, crunchy twist on the age-old Indian tradition of ending a meal with a natural digestive and breath freshener. Made with a blend of sesame seeds, chia seeds, watermelon seeds, sunflower seeds, and pumpkin seeds, this colourful mix is packed with tiny superfoods. Each seed adds its own goodness. Sesame for calcium and healthy fats, Chia for fibre and omega-3, Watermelon seeds for minerals, Sunflower seeds for vitamin E, and Pumpkin seeds for protein and zinc. Together, they help freshen the breath, support digestion, and nourish the body with every little pinch.  I always store my mix seeds mouth freshener in an airtight glass jar in the fridge to keep it crunchy and fresh for weeks. Just take a small spoonful after meals and enjoy a burst of taste and health, naturally.

Ingredients

  • ½ cup Sesame seeds.
  • ½ cup Flax seeds
  • ½ cup Watermelon seeds
  • ½ cup Pumpkin seeds.
  • ½ cup Sunflower seeds.
  • ½ cup Chia seeds.
  • ½ cup Fennel seeds(optional)
  • 1 tsp. Ghee
  • 1 tsp. Rock salt.( Sendha Namak)

Method

  1. On a slow flame dry roast each seeds  separately in a nonstick pan.
  2. Once all seeds roasted, mix them in the same pan on the slow flame and pour ghee and stir well so that all seeds become greasy.
  3. Now add salt and mix well . Switch off the flame and Mix seeds mouth freshener is ready.
  4. Cool down completely. Store in a glass jar in the refrigerator.
  5. Serve spoonful of it after  meal. Serve it with love and smile.
Categories
chutney My recipes

(513) Green Mint Chutney

Ingredients

  • 2 cups Mint leaves(Phudina)
  • 1 cup Coriander leaves.
  • 2 Green chilies.
  • ¼ cup Roasted chana OR Sev OR Daliya dal.
  • 2 Lemon juice cubes OR 1 lemon or ¼ cup Raw Mango pieces.
  • 1 tsp. Salt.

Method

  1. Pluck leaves from the sprigs of Mint plant.
  2. Pluck tender twigs of Coriander.
  3. Wash thoroughly both the greens.
  4. Roughly chop coriander and add in the mixture grinder jar. Add all other ingredients and grind them into fine paste. Green mint chutney is ready to serve.
  5. Transfer paste into silicon ice tray  and refrigerate for 6-8 hours
  6. After 8 hours unmould the cubes and store in the ziplock bag in the frizer.
  7. When require defrost the cube and serve it. Serve it with love and smile.

List Of My Recipes

Categories
My recipes snacks

(512) Poha Chivda

Ingredients

  • 1 cup white thin poha
  • ⅛ cup Peanuts.(Optional)
  • ⅛ cup Daria dal.
  • 1 red chilli powder
  • ¼ tsp. turmeric powder.
  • 1½ tsp. fresh lemon juice.
  • 1½ tbsp. oil for tempering.
  • ⅛ tsp. Mustard seeds.
  • ⅛ tsp. Asafoetida powder.
  • ½ tsp. salt .

Method

  1. Dry roast thin poha and when it turns crispy, switch off the flame. Transfer the roasted poha in another vessel.
  2. Heat oil in kadhai.
  3. Add mustard seeds and wait for crackling sound.
  4. Add Asafoetida powder, red whole chilli and curry leaves. Saute till it turns crispy.
  5. Add peanuts and Daria dal. Saute it at low flame. Stir continuously till it turns crispy.
  6. Add turmeric powder and mix quickly. Add poha and lemon juice in it.Stir continuously till lemon juice reduces and again poha looks crispy.
  7. Crispy poha chivda is ready to serve. Serve with masala tea or herbal tea or masala milk or as you wish.
  8. Serve with love and smile.